Most sprouts do not need light to germinate. Seeds sprout using stored energy, so the actual moment of germination happens perfectly fine in total darkness. But once a sprout starts growing and you want it to green up, develop flavor, and build any real nutritional value, light becomes important pretty quickly. If you skip light entirely past the first few days, you end up with pale, spindly, weak growth that's not much to write home about. The good news is that you don't need a fancy setup: a bright windowsill or a basic fluorescent strip light is more than enough.
Do Sprouts Need Sunlight to Grow? Indoor Light Guide
Marcus Hartley
23 May 2026
Do sprouts actually need light to grow
The honest answer is: it depends on what stage you're talking about and what you're trying to grow. Seeds germinate using the energy packed inside them, not by photosynthesizing. That means the first crack of a seed coat and the emergence of a tiny root (the radicle) happens whether the seed is in the light or the dark.
In fact, many seeds actually prefer darkness to germinate, and you can cover them in a dark bag or tray lid until they start poking up. Some seeds, though, do require light to trigger germination at all, so it's worth checking your specific variety before you start. Some seeds are light-requiring, and they should not be buried because light is needed to trigger germination [Some seeds, though, do require light to trigger germination at all](https://extension. unh.
edu/resource/starting-plants-seed-fact-sheet).
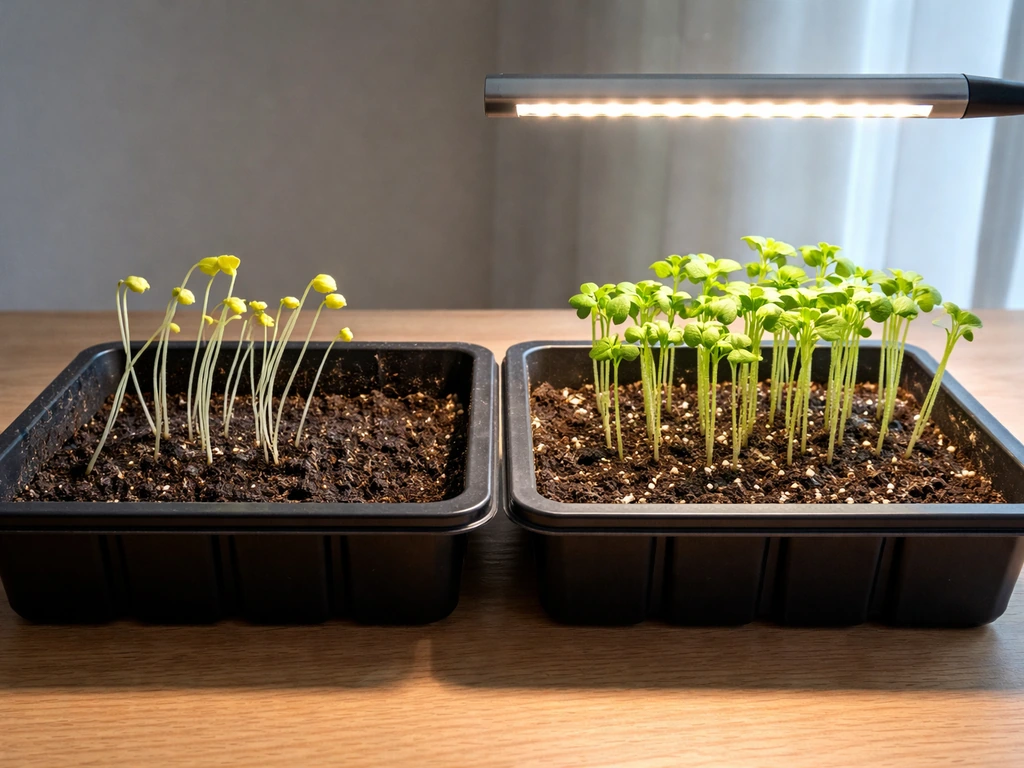
Once the shoot is up and the first leaves are visible, the plant shifts gears. It can no longer survive on stored energy alone and needs to start photosynthesizing. This is when light stops being optional. For grass, sunlight is important once you’re past germination because it powers photosynthesis and helps the blades turn green and grow well grass needs sunlight to grow. Without it, the seedling goes into what plant scientists call etiolation: it stretches its stem longer and longer trying to find a light source, stops producing chlorophyll, and ends up pale, weak, and floppy. It's essentially a survival mode, and it's not where you want your sprouts to stay.
What light does for sprouts vs mature plants
Mature plants use light mainly to power photosynthesis and fuel long-term growth. Sprouts are a bit different. In the very early days, a sprout is just mobilizing what's already inside the seed. Light doesn't power that process, but it does control how the plant develops its structure and chemistry even before it's technically a seedling.
Research on broccoli sprouts, for example, shows that light exposure changes which pigments and bioactive compounds develop, meaning a light-grown sprout can have a different nutritional profile than a dark-grown one. Light-grown sprouts also tend to produce more chlorophyll (hence the green color) and certain antioxidants. [Controlled research on mung bean sprouts](https://www. mdpi.
com/2223-7747/9/9/1093) shows that light and low relative humidity can increase antioxidants content. Virginia Cooperative Extension notes there's a slight nutritional advantage to light-grown sprouts, which is worth knowing if you're growing them specifically for health reasons.
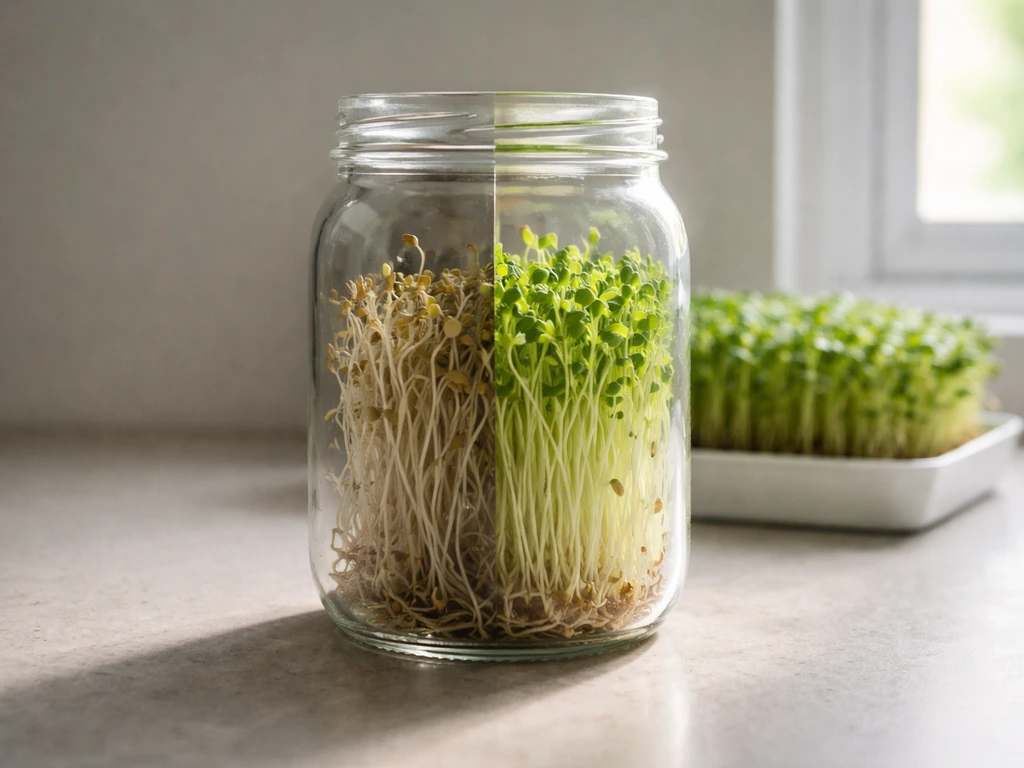
The other big job light does for young sprouts is regulate shape. When light hits the seedling, it signals the plant to slow stem elongation and focus energy on leaf development instead. Without that signal, the stem keeps stretching. This is why dark-grown sprouts look long and pale and why wheatgrass starts off yellow and only turns that familiar deep green once it gets some light. The transition from pale to green (called de-etiolation) can happen within hours of introducing light, which is pretty satisfying to watch.
How to grow sprouts at home: light vs no-light setups
You have two real-world paths here, and both work depending on what you want at the end.
Growing sprouts in the dark
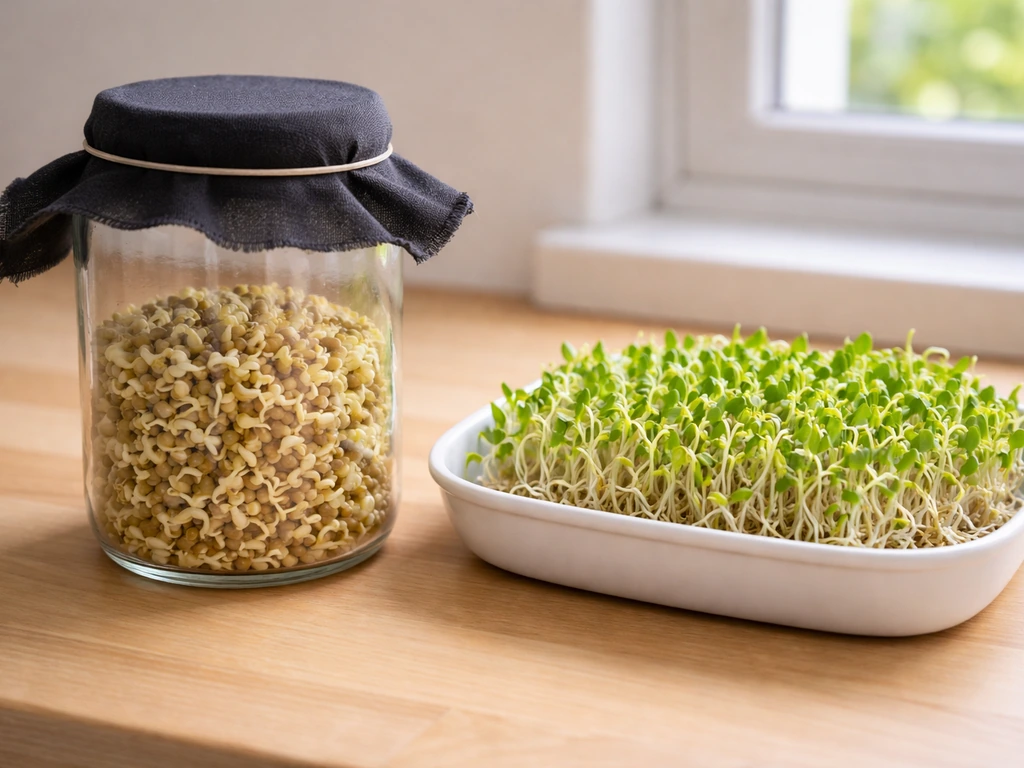
This is the classic jar-on-the-counter method for eating sprouts like mung bean, lentil, or chickpea. You soak the seeds overnight, drain them, and keep them in a jar covered with mesh or cheesecloth, rinsing twice a day. No light required at all for this style of sprouting. Seaweed cultivation is different from sprouts, and it generally relies on light, especially sunlight or an equivalent light source No light required at all.
The sprouts stay white or pale yellow, but they're perfectly edible and nutritious. The critical thing here isn't light but moisture management: drain every drop of standing water after rinsing, because sitting water is how mold starts. Virginia Tech extension sprouting guidance is clear on this, instructing to drain off excess water as a non-negotiable step.
Growing sprouts with light
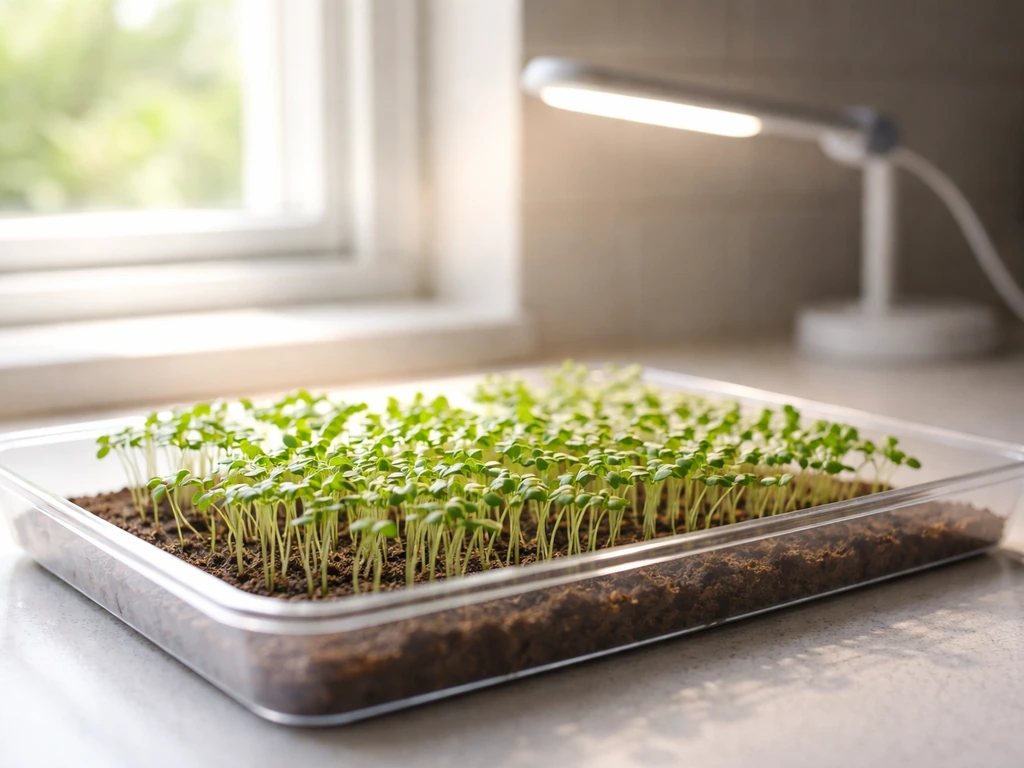
If you want green sprouts (think sunflower shoots, pea shoots, wheatgrass, or microgreens), you start in the dark and introduce light after germination. A common approach used for microgreens is to keep the tray covered and dark for the first two to four days while the seeds germinate, then move them into light once shoots are visible. This 'dark early, light later' approach gives you the best of both: reliable germination followed by green, upright, nutritious growth.
Bird nest fern (Asplenium nidus) is a different plant than sprouts, so it has its own specific sunlight needs for healthy fronds. For most of these crops, a south- or east-facing windowsill works well. Ginger, however, generally does best with bright light rather than harsh direct sun south- or east-facing windowsill. If your apartment doesn't get great natural light, a basic LED or fluorescent fixture a few inches above the tray does the job.
Timing and expectations: when and how long to sprout
Here's a rough timeline for common indoor sprouts so you know what to expect at each stage:
| Sprout type | Soak time | Days to first shoot | Days to harvest | Light needed? |
|---|---|---|---|---|
| Mung bean | 8-12 hours | 1-2 days | 4-6 days | Optional (keeps pale without) |
| Lentil | 8-10 hours | 2-3 days | 5-7 days | Optional |
| Radish | 6-8 hours | 2-3 days | 5-6 days | Yes, for greening |
| Broccoli | 6-8 hours | 2-3 days | 5-7 days | Yes, for nutritional profile |
| Pea shoots | 8-12 hours | 3-4 days | 8-12 days | Yes, after germination |
| Wheatgrass | 8-12 hours | 2-3 days | 7-10 days | Yes, for green color |
Germination kicks off the moment the seed absorbs water and conditions are warm enough, typically somewhere between 65 and 75°F. You don't need to do anything special light-wise until shoots appear above the growing medium or out of the jar. Once you see that growth, move them into light if you want green, upright sprouts. If you're eating jar-style sprouts that stay pale, you can skip the light step entirely.
Best light choices indoors: sunlight, LED grow lights, and fluorescent
Sprouts and very young seedlings have low light demands compared to, say, tomatoes or peppers. You don't need intense grow lighting. Here's how each option plays out in practice:
| Light source | Best for | Distance from sprouts | Daily duration | Cost |
|---|---|---|---|---|
| South/east window (sunlight) | Bright apartment setups, spring/summer growing | N/A, place tray directly at window | Natural daylight hours (ideally 6+ hrs direct) | Free |
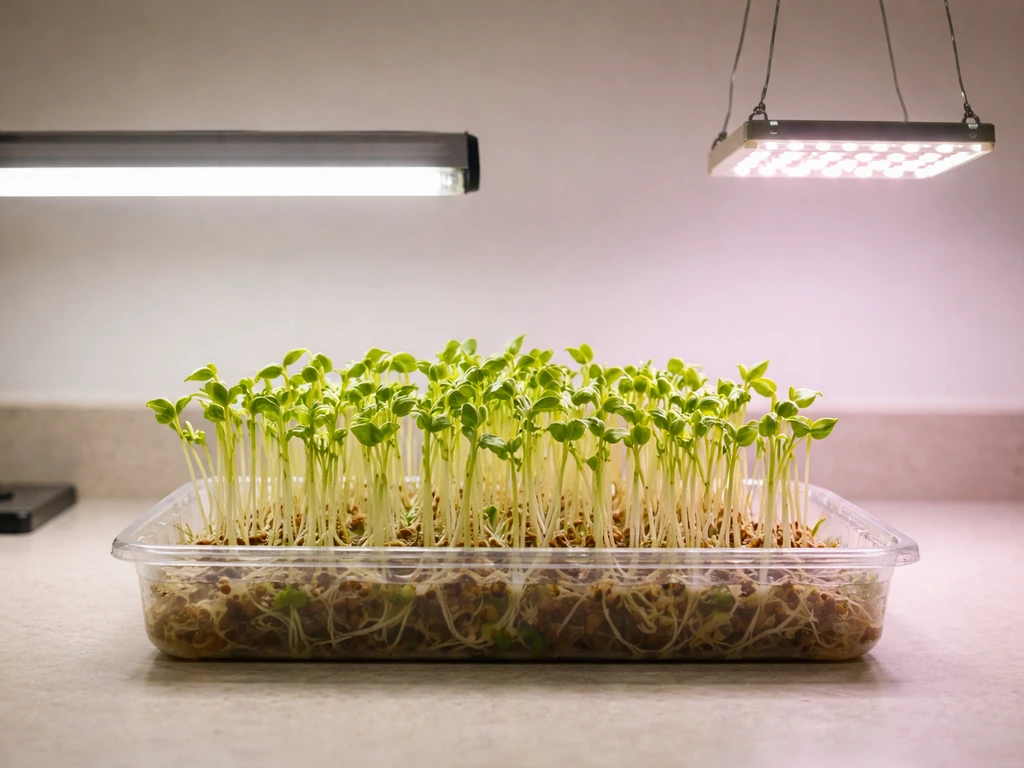
| LED grow light (full-spectrum) | Year-round, low-light apartments, consistent results | 4-8 inches above tray | 12-16 hours per day | Low to moderate upfront |
| Fluorescent (T5/T8 tube) | Budget option, works well for sprouts and seedlings | 2-4 inches above tray | 14-16 hours per day | Low upfront |
A south-facing window in late spring or summer is genuinely great for greening up sprouts. In winter or in a north-facing apartment, windows often don't deliver enough light duration or intensity, and that's when you notice the leggy, pale results that can be frustrating. For indoor growing year-round, a simple T5 fluorescent strip or a budget LED panel kept just a few inches above the tray is honestly more reliable than window light.
The key with fluorescent fixtures especially is to keep them close. The light intensity drops off fast with distance, so 2 to 4 inches above the tray is a good target. LED grow lights are a bit more forgiving and can sit 4 to 8 inches away while still delivering useful intensity.
Run lights for around 12 to 16 hours a day for sprouts transitioning to the light phase. A simple outlet timer costs a few dollars and takes the guesswork out of it. This mirrors the kind of daily light dose (sometimes called DLI, or daily light integral) that extension lighting guides reference when setting up seedling stations.
Common problems caused by light issues and how to fix them
Most problems with indoor sprouts come down to either too little light at the wrong stage or too much standing water. Here are the symptoms you're most likely to see and what to do about each one:
- Long, floppy, thin stems (legginess): This is etiolation in action. The sprout is stretching toward a light source that's either too far away or not strong enough. Move the tray closer to the light source, add more hours of light per day, or switch to a stronger bulb. Illinois Extension notes that insufficient light and overcrowding are the two main culprits for leggy seedlings.
- Pale yellow or white color past day 4-5: Your sprouts haven't had enough light to trigger chlorophyll production. Move them to a brighter spot or under a grow light. Green-up can happen within a day or two once they get adequate light.
- Mold or slimy roots: This is a water issue, not a light issue, but it's the most common sprouting failure. You're not draining thoroughly enough after each rinse. Tip the jar or tray at an angle after rinsing so every drop drains out. Improve air circulation around the setup as well.
- Uneven growth (some sprouts tall, some short): Usually caused by uneven light coverage or crowding. Rotate the tray 180 degrees daily if using a window, or make sure the grow light covers the whole tray evenly. Thin the seeds if they're packed too tightly.
- Sprouts turning bitter or tough: Extended light exposure past the ideal harvest window can stress the sprouts. Harvest at the right time for your variety (see the timing table above) and don't leave them under intense light for too long after they've reached eating size.
Practical step-by-step next setup recommendations
Here's how to set things up today based on your actual light situation at home:
If you have a bright south or east window
- Soak your seeds (8-12 hours for most varieties) in a jar of clean water.
- Drain completely and set the jar or tray in a dark spot or cover it for the first 2-3 days.
- Once you see shoots emerging, move the setup to the brightest windowsill you have.
- Rinse twice daily and drain every drop of standing water each time.
- Rotate the tray daily so all sprouts get even light exposure.
- Harvest at the timing shown in the table above, before they get bitter or tough.
If you have low or inconsistent natural light
- Follow the same soak and dark-germination steps above.
- Once shoots appear, place the tray under a T5 fluorescent strip or a basic LED grow panel.
- Keep the light 2-4 inches above the tray for fluorescent, or 4-8 inches for LED.
- Run the light for 14-16 hours per day using a basic outlet timer.
- Rinse, drain, and harvest as normal.
If you're growing jar-style sprouts for eating (mung bean, lentil, chickpea)
- Soak overnight, drain, and keep the jar on your counter covered with mesh.
- Rinse twice a day and drain completely each time.
- No light needed. These are ready to eat in 4-6 days.
- If you prefer some green on them, place the jar near a window for the last day or two before eating.
Sprouts are one of the most forgiving things you can grow indoors, and the light requirements are genuinely low compared to other plants. The setup is cheap, the turnaround is fast, and once you get the rinse-and-drain rhythm down, you'll rarely have failures. If you're also experimenting with other quick-growing edibles indoors, it's worth noting that plants like cress behave similarly to sprouts in their early light needs, while plants like ferns and bird nest ferns sit at the other end of the spectrum with much more specific ongoing light requirements. For sprouting specifically, keep it simple: dark to start, light to green up, drain well, and harvest on time.
FAQ
If my sprouts are in a dark cabinet during germination, will they rot or fail?
Dark storage during the first stage is usually fine, but you must still control moisture. Keep seeds rinsed and drained properly, and avoid leaving them submerged between rinses. If you notice sour smell, slimy sprouts, or wet puddles at the bottom, it is a drainage problem, not a light problem.
How much light is enough for green sprouts indoors?
Aim for “bright enough to prevent stretching,” not “sunlight levels.” A windowsill can work if it gets consistent daytime brightness, but in low winter light you will often need a fixture placed close to the tray. A practical target is keeping the light 2 to 4 inches from the plants for fluorescent and roughly 4 to 8 inches for LEDs during the greening stage.
Do sprouts need a full day of light, or can I do shorter lighting cycles?
They generally tolerate less than outdoor conditions, but the greening phase benefits from a steady daily dose. For most indoor setups, running lights about 12 to 16 hours per day is a workable starting point. If you go much shorter, expect slower greening and leggier growth.
What should I do if my sprouts turn pale and stretchy even after I move them to the window or light?
First check timing. You should introduce light once shoots are visibly growing, then keep the light on consistently. Next check distance and intensity, fluorescent especially loses strength quickly with distance. Also make sure you are not letting excess water accumulate, since poor rinsing can weaken growth and worsen the look.
Can I leave jar sprouts without light for longer than the “first few days” and still eat them safely?
Pale jar-style sprouts are typically edible, but safety depends on hygiene and drainage, not on light color. Continue rinsing on schedule, drain thoroughly, and harvest within the usual sprout window for that seed. If you see mold, off odors, or persistent wetness, discard and restart.
Do all sprout types respond the same way to light?
No. Some seeds and shoots are grown for white or pale eating, while others are grown for greenness, flavor, and higher chlorophyll. Also, certain plants grown as “greens” like microgreens or wheatgrass behave more like seedlings and need an actual light period to develop properly.
Why do some sprouts get long stems, even when I think I gave them enough light?
Etiolation happens when the plant does not receive a strong enough light signal during the greening stage. Common causes are light introduced too late, lights set too far away, or interrupted lighting (for example, frequent overnight darkness during the greening window).
Does direct sun through a window cause problems for indoor sprouts?
Usually the risk is overheating or uneven exposure rather than permanent damage. If your window gets harsh midday sun, start by placing trays slightly back or using indirect bright light. For heat-sensitive varieties like ginger, bright light without intense direct rays is often a safer choice.
Can I use grow lights in place of a windowsill, and do I need UV or special bulbs?
No special UV is required for most sprouting. A basic LED or fluorescent fixture that delivers adequate brightness at the right distance is enough. Use a timer to keep the daily schedule consistent, since inconsistent light can lead to irregular height and uneven greening.
Does light affect nutrition, or is color just cosmetic?
Light can shift pigments and some bioactive compounds, so light-grown sprouts can differ from dark-grown ones. If you are growing for maximum greenness and typical “health greens” expectations, plan a defined light phase after germination rather than leaving sprouts pale by default.
How do I prevent mold if I am not using sunlight?
Use the rinse-and-drain rhythm reliably. After each rinse, drain every drop of standing water, and keep sprouts from sitting in a wet pile at the bottom of the jar or tray. Also make sure containers have airflow (mesh or cheesecloth coverings) so moisture does not stagnate.