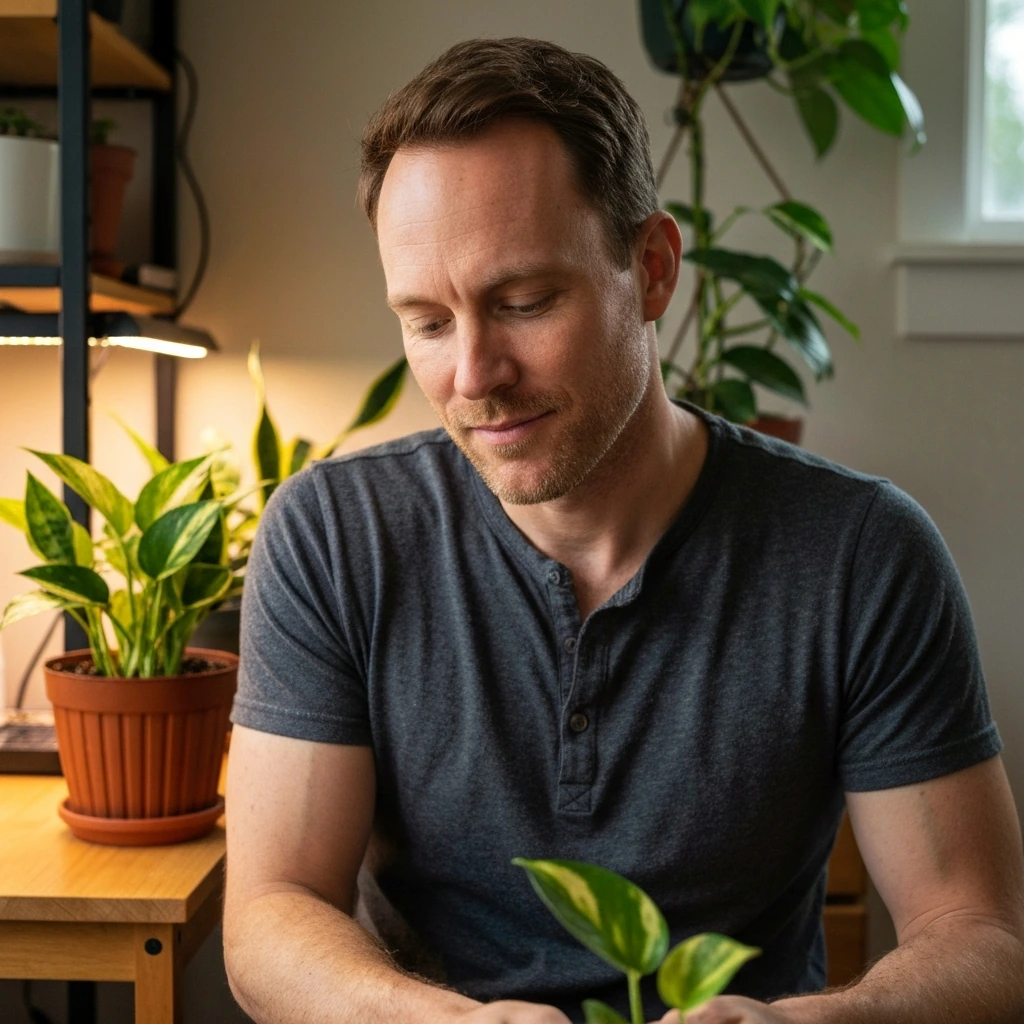
Yes, air plants can absolutely grow and thrive under artificial light. Under what circumstances will plants grow in artificial light? I've kept Tillandsia going strong in a windowless bathroom and a dim apartment corner for years, using nothing but grow lights. The key is understanding what "bright indirect light" actually means in lumen and distance terms, then replicating that with the right bulb at the right distance for the right number of hours. Get those three things right, and your air plant will not only survive but push out new leaves and even bloom. do plants grow better with sunlight or artificial light
Can Air Plants Grow in Artificial Light? How to Set Up
Marcus Hartley
24 Mar 2026
What air plants actually need from light
Tillandsia are bromeliads, and like most of that family, they're reasonably adaptable when it comes to light. The University of Illinois Extension describes their ideal as "bright, indirect sunlight," which in practical terms means plenty of light intensity without direct midday sun burning the leaves. But here's the thing: the "bright indirect" rule is a starting point, not a hard ceiling or floor. The Bromeliad Society notes that Tillandsia can be found growing in conditions ranging from deep shade to full sun in the wild, depending on the species. That range is actually great news for indoor gardeners.
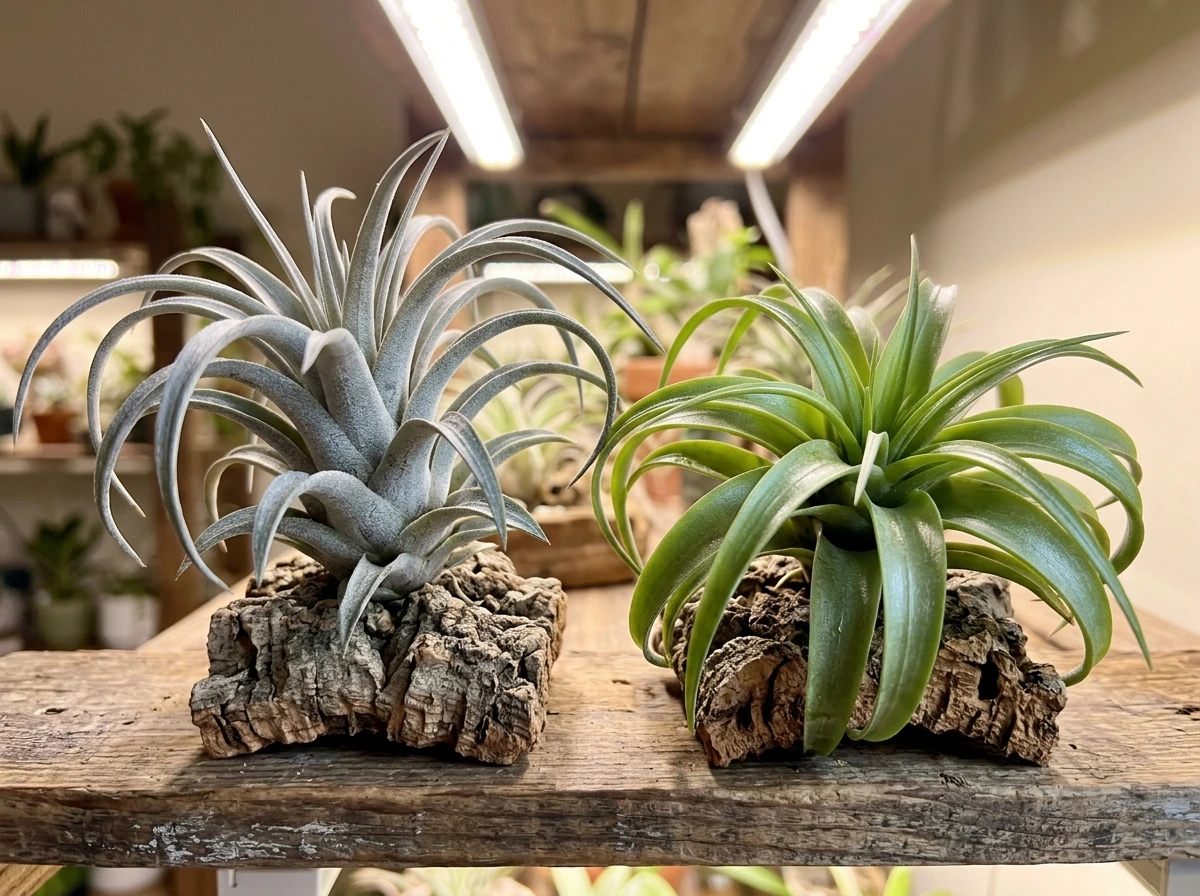
The real variable is the leaf type. Gray or silver-leaved air plants, like Tillandsia xerographica or T. tectorum, have dense trichomes (tiny scales) that reflect intense light and help them survive in brighter, drier conditions. The Sill and Mountain Crest Gardens both point out that xerographica can handle bright direct light indoors, not just indirect. Green, smooth, or thinner-leaved species like T. ionantha or T. stricta are more shade-tolerant and can do well in lower light levels. So before you build your lighting setup, it helps to know which species you have.
How many hours of light per day
Air plants do best with 12 to 16 hours of artificial light per day. They're not short-day plants that need a specific dark period to trigger flowering (though some species flower seasonally in nature), so a consistent 12 to 14 hour photoperiod works well for most indoor setups. I personally run mine on 14-hour cycles with a timer, and they stay healthy and compact without stretching. Going below 10 hours regularly will slow growth noticeably. Going above 16 hours is rarely a problem for most species, but there's no real benefit either, and it adds to your electricity bill unnecessarily.
Which artificial lights actually work
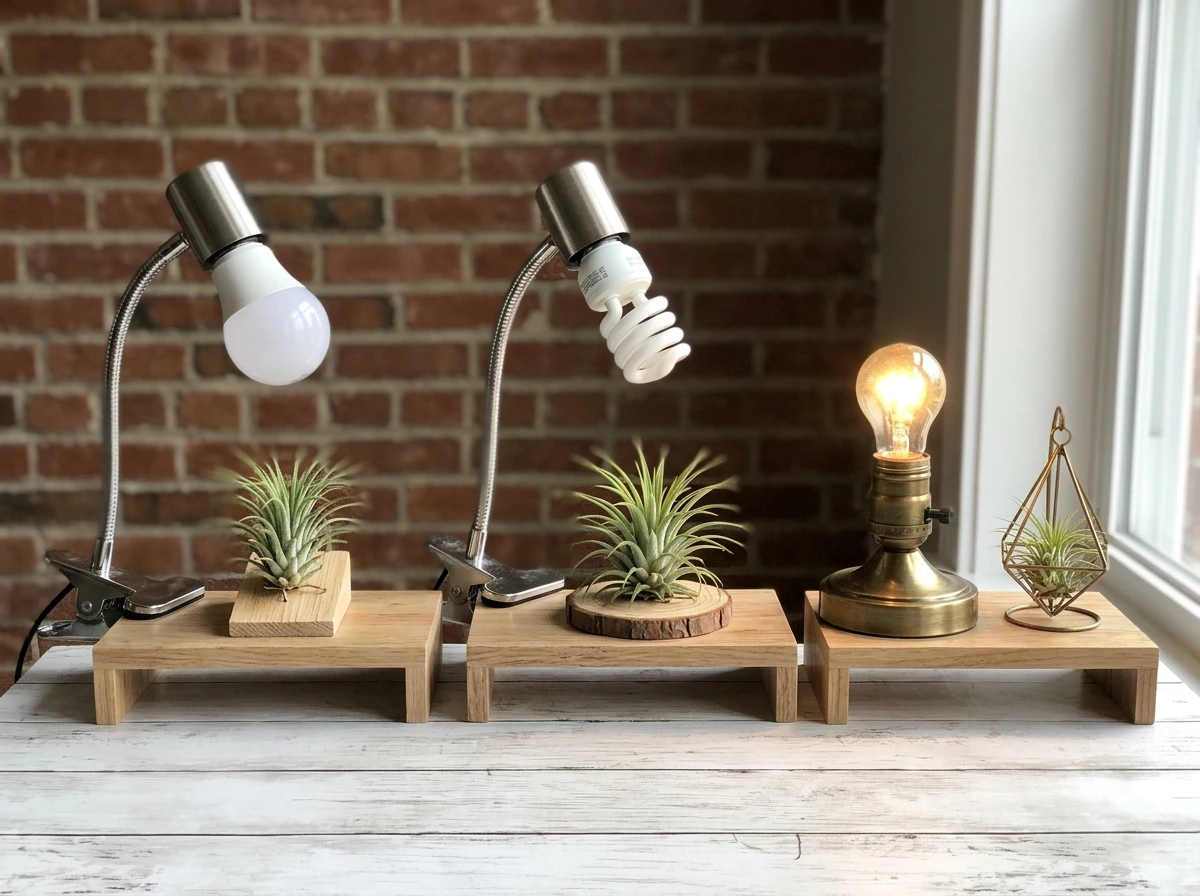
Not all bulbs are equal, and the type of light source you choose will affect how close you need to place it and how well your plant responds. Here's an honest breakdown of your main options.
| Light Type | Spectrum Quality | Intensity | Best For | Typical Distance from Plant |
|---|---|---|---|---|
| Full-spectrum LED grow light | Excellent (red + blue + white) | High | All Tillandsia species, especially high-light types | 6 to 18 inches |
| Fluorescent / CFL (full-spectrum) | Good | Moderate | Green-leaved, shade-tolerant species | 6 to 12 inches |
| T5 fluorescent (shop light) | Good | Moderate to high | Most species, especially in groups | 4 to 10 inches |
| Standard LED (warm or cool white) | Moderate | Low to moderate | Low-light-tolerant species only | 4 to 8 inches |
| Incandescent bulb | Poor | Low, high heat output | Not recommended | Not recommended |
LED grow lights are the best all-around choice right now. They run cool, use less electricity, and deliver a full spectrum that covers both the blue wavelengths (400 to 500 nm) that drive leafy vegetative growth and the red wavelengths (600 to 700 nm) that support flowering. A small panel-style LED grow light in the 20 to 45 watt range is more than enough for a collection of a dozen or so air plants. You don't need anything expensive or elaborate. They run cool, use less electricity, and deliver a full spectrum that covers both the blue wavelengths (400 to 500 nm) that drive leafy vegetative growth and the red wavelengths (600 to 700 nm) that support flowering. A small panel-style LED grow light in the 20 to 45 watt range is more than enough for a collection of a dozen or so air plants. You don't need anything expensive or elaborate.
Fluorescent tubes and CFLs are a solid second choice and often already in people's homes or offices. They work well for the greener, softer-leaved Tillandsia species that prefer lower light. If you're using a standard shop-light-style T8 or T5 fluorescent fixture, you'll want to keep plants within about 6 to 10 inches of the tubes to get enough intensity. The farther you get from a fluorescent bulb, the faster the light intensity drops off. A rule of thumb: light intensity drops by roughly 75 percent when you double the distance from the source, so placement really matters here. If you're curious how regular light bulbs perform for plants more generally, that's a topic worth exploring on its own.
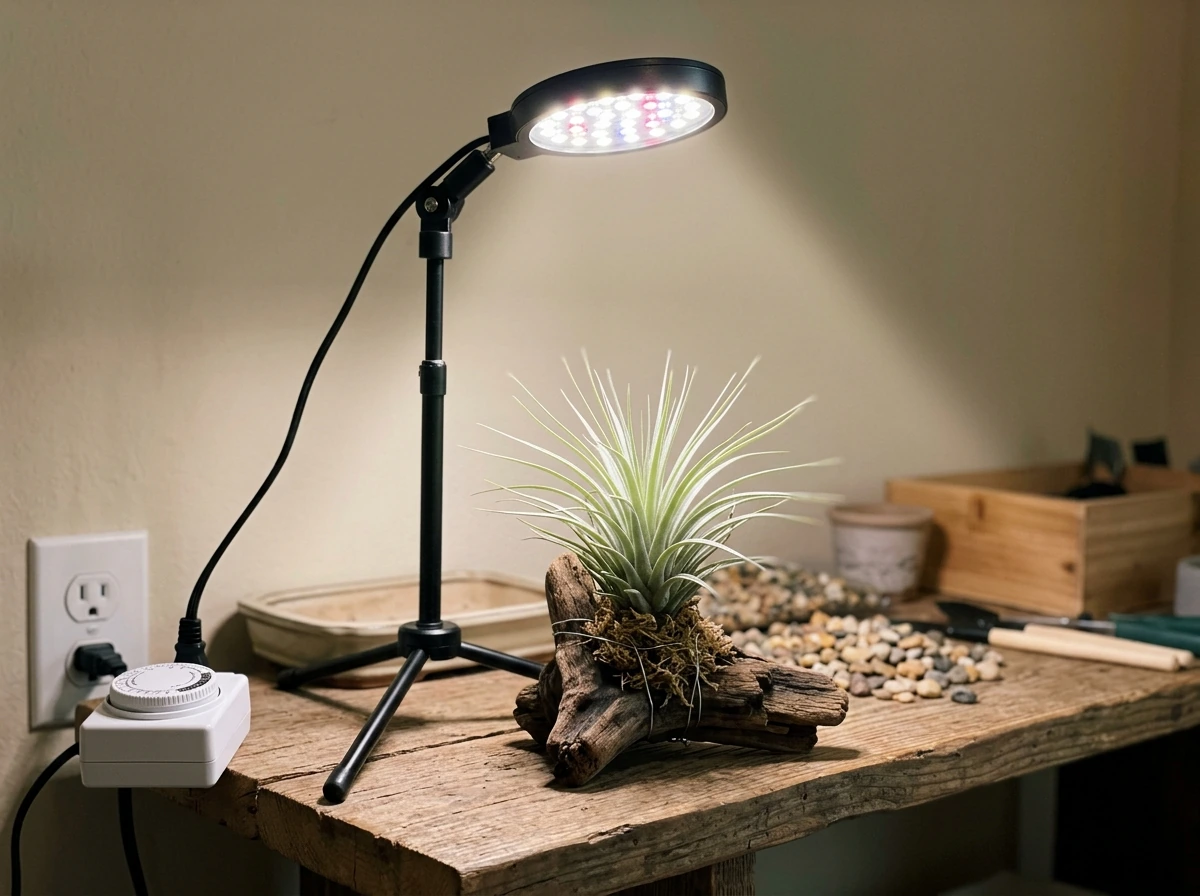
Setting up your light: distance, schedule, and intensity
The single most common setup mistake I see is placing the light too far away. Plants look like they're "under" the light, but they're not actually receiving enough intensity to do real photosynthesis. Here's how to set things up properly from day one.
- Choose your light source first. For most people, a mid-range full-spectrum LED grow light (20 to 45 watts) or a T5 fluorescent fixture works well.
- Position the light 6 to 18 inches above your air plants for LED grow lights. Start at 12 inches and adjust based on plant response. For fluorescent/CFL, start at 6 to 10 inches.
- Set a timer immediately. A 12 to 14 hour on/off cycle works for almost all Tillandsia species. I recommend 7 AM to 9 PM as a default schedule so the plants have a natural-feeling rhythm.
- If you have a mix of species, place higher-light gray-leaved plants (like xerographica) closer to the center of the light footprint, and greener, more shade-tolerant plants toward the edges or slightly farther down.
- Check your setup after two to three weeks. Look for the response signs described below and adjust distance or duration accordingly.
Timers are non-negotiable. Consistency matters more than perfection. A $10 to $15 mechanical outlet timer is all you need, and it means you'll never forget to turn the light on or accidentally <span>leave it running 24 hours</span>. can plants grow with 24 hour light Consistent photoperiods help air plants maintain a steady growth rhythm and reduce stress.
Adjusting for brightness: a practical approach
If you don't have a PAR meter (most people don't, and that's fine), you can use a simple smartphone lux meter app to get a rough sense of the light intensity at your plant's position. Aim for roughly 2,000 to 3,500 lux for shade-tolerant green-leaved species and 3,500 to 7,000 lux for high-light silver or gray-leaved types like xerographica. These aren't exact targets, just useful ballpark numbers. If your reading is way below those ranges, move the light closer or add a second bulb. If it's significantly above, either raise the light or shift sensitive plants farther from the center.
How to tell if your plant is getting the light wrong
Air plants will tell you what they need if you pay attention. The signs are pretty readable once you know what to look for.
Signs of too little light
- Leaves elongate and the plant stretches upward or outward (etiolation), reaching toward the light source
- New growth comes in paler or more washed-out than the parent plant
- Overall growth slows dramatically or stops over several months
- The plant feels soft or limp more often than usual (combined with other stress factors)
If you're seeing these signs, move the light 2 to 4 inches closer, or extend your photoperiod by 1 to 2 hours. Give it two to three weeks to respond before making another adjustment.
Signs of too much light
- Leaf tips turning brown or crispy, especially toward the light source
- Leaves curling inward tightly or taking on a bleached, washed-out color
- The base of the plant drying out very rapidly between waterings
- A generally parched, stressed appearance despite regular watering
If you're seeing these signs, raise the light by 3 to 6 inches, reduce your photoperiod by an hour or two, or move particularly sensitive green-leaved species farther from the center of the light footprint. LED grow lights at very close range can push more heat and intensity than some air plants want, especially thin-leaved species. Gray-leaved types like xerographica can usually handle closer placement without complaint.
The rest of the care equation: watering, airflow, and drying
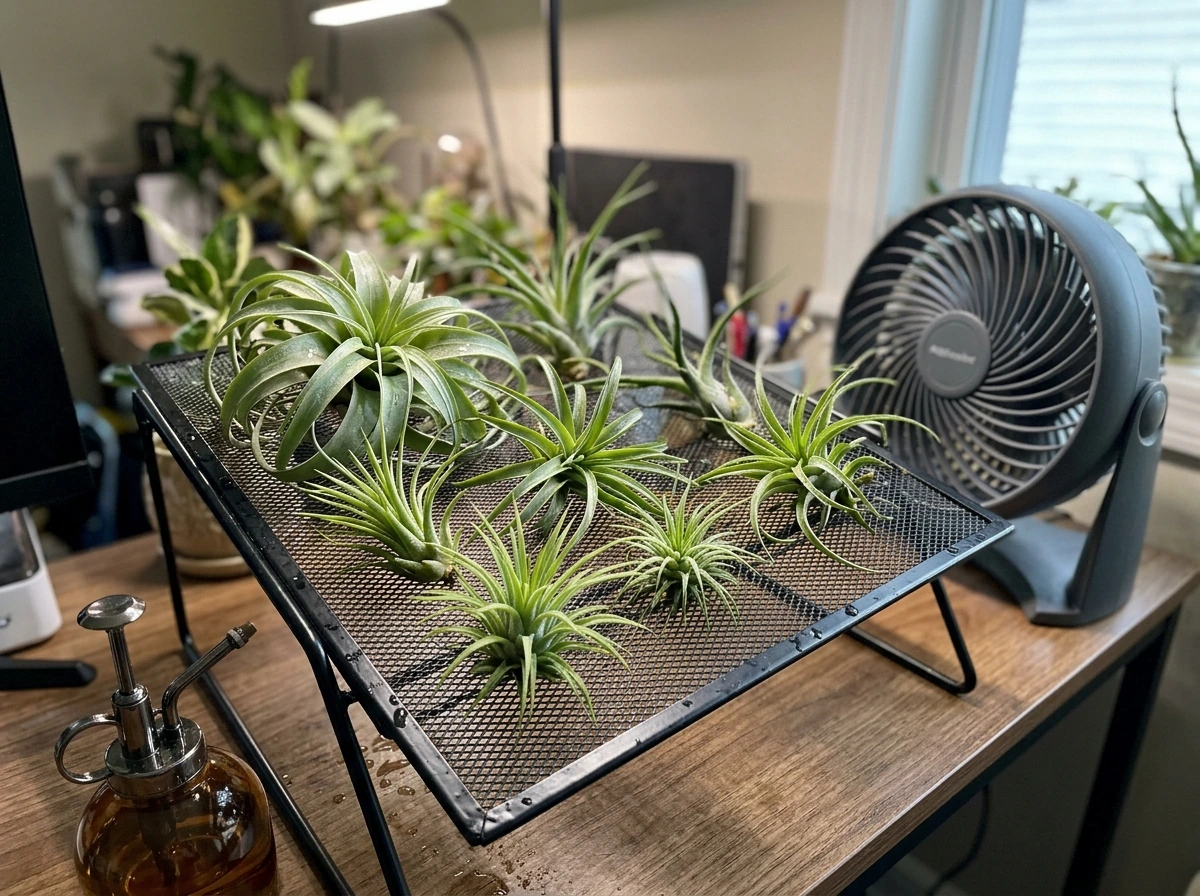
Here's something I learned the hard way: getting the light right is only half the battle. Air plants under artificial light still need to be watered properly, and the interaction between light, heat, and drying time is where most indoor failures happen.
The University of Illinois Extension specifically calls out good air circulation as essential, because Tillandsia need to dry out fully between waterings. Under artificial grow lights, especially in warm indoor spaces, this is actually easier to manage than it sounds. The warmth and airflow from a nearby fan (even a small USB desk fan on low) speeds up drying time and mimics the breezy conditions air plants get in nature.
For watering frequency under artificial light: in warm indoor conditions (above 65°F), plan on misting every 2 to 3 days or doing a full 20 to 30 minute soak once a week. After soaking, always shake out excess water and set the plant upside down or tilted on a towel in a spot with airflow for at least 1 to 4 hours before placing it back under the light or in any enclosed display. Water sitting in the crown of the plant under a warm grow light is a recipe for rot.
Under grow lights, water evaporates faster than in a dim corner, so you may need to water slightly more often than you would in a low-light spot. Watch the leaves: if the tips start to look dry and the leaves feel lighter and slightly papery, it's time to soak. If the base feels soft or discolored after watering, you have a rot issue and need to let the plant dry more thoroughly before the next watering.
Common mistakes and a quick troubleshooting checklist
Most artificial light failures with air plants come down to a handful of fixable mistakes. Run through this list if things aren't going well.
- Wrong bulb type: using a warm incandescent or dim decorative bulb instead of a full-spectrum LED or fluorescent. These do not provide the spectrum or intensity Tillandsia need.
- Light too far away: the most common mistake. Even a good grow light delivers weak intensity at 24 inches. Get it to 6 to 18 inches depending on the bulb.
- No timer or inconsistent photoperiod: running the light all day some days and forgetting it others stresses the plant and makes it harder to diagnose problems.
- Overwatering under low light: if the light is weak and the space is cool, the plant is photosynthesizing slowly and using water slowly. Watering on a fixed schedule without accounting for conditions leads to rot.
- No airflow: leaving air plants in a sealed glass globe or enclosed terrarium under a grow light traps moisture and heat. Always provide ventilation.
- Not drying after soaking: placing a wet air plant directly back under a warm grow light without proper drying time is the fastest route to crown rot.
- Treating all Tillandsia the same: gray-leaved species like xerographica want more light; green-leaved species like ionantha want less. Mix your placement accordingly.
- Giving up too soon: air plants grow slowly. Give any lighting change at least two to three weeks before deciding it isn't working.
If you're just getting started and want to keep things simple: grab a full-spectrum LED grow light in the 20 to 40 watt range, hang it 10 to 12 inches above your plants, set a timer for 14 hours on and 10 hours off, mist every two to three days (or soak weekly), and make sure there's some air movement. That setup will work for the vast majority of Tillandsia species you're likely to find at a garden center or online. From there, you can fine-tune based on how your specific plants respond. Air plants are more forgiving than their exotic reputation suggests, and getting them dialed in under artificial light is genuinely satisfying once you see new growth coming in.
FAQ
Can air plants grow in artificial light if I use 24-hour lighting?
Yes, you can, but only if the plant is getting enough intensity during the “on” period and you still allow a full dry-out after watering. The bigger risk is not the long light itself, it is leaving moisture in the crown while airflow is low. If you run longer cycles, use a timer, keep watering intervals the same or slightly longer, and make sure the plant is dry and airy before it goes back under the light.
Do air plants need darkness to thrive under grow lights?
Usually, no. Air plants generally need a dark period for normal rhythm, and consistently pushing extreme schedules can stress thin-leaved green species. A practical approach is to start with 12 to 14 hours on, 10 to 12 hours off, then adjust by moving the light or changing the hour count only by 1 to 2 hours at a time.
What should I do if my air plants have different light needs under the same grow light?
It depends on species and leaf type, but as a safeguard, separate your collection by light preference. Silver or gray-leaved types (for example, xerographica) can sit closer to the LED, while green or thinner-leaved species often need to be positioned farther away or under a less intense portion of the light footprint. A simple setup is to place the higher-light plant(s) in the center and the more light-sensitive plants at the edges.
My air plant looks stretched or pale, is it more likely under-lit or under-watered?
If a plant keeps stretching or looks loose and pale, treat that as a light deficit, not a watering problem. Move the light closer by 2 to 4 inches or add 1 to 2 hours to the photoperiod, then wait two to three weeks before changing again. Avoid the common mistake of misting more often as a first response.
How can I tell if my air plant is getting too much artificial light?
White or bleached-looking patches and crispy tips can indicate too much intensity, especially right under a hot or very close LED. Fix it by raising the light 3 to 6 inches, reducing photoperiod by 1 to 2 hours, or shifting the plant farther toward the edge. Keep in mind that sudden changes can shock plants, so adjust gradually.
How accurate are smartphone lux meter apps for setting up grow lights for air plants?
A watchout is that lux readings can vary a lot based on phone model and camera settings, so use them as a rough guide, not a target you chase perfectly. If you’re using an app, take readings at the plant’s exact resting height and compare before-and-after when you adjust distance. If you cannot get reliable readings, go by plant response and keep adjustments small.
What is the safest way to dry air plants after watering under grow lights?
For most indoor grow setups, you’ll want to keep water off the crown long enough to dry out quickly, especially under warmer LEDs. After soaking, shake out excess water and place the plants tilted or upside down in airflow for at least 1 to 4 hours, then return them to the light only when they feel completely dry. This single step prevents many rot cases.
Why do my plants do well under the light but others in the same room struggle?
Yes, mounting height and lamp angle matter even with the same bulb and wattage. If you notice uneven growth, rotate the plant positions weekly and verify the center versus edge intensity. Using a small panel LED, you typically get better uniformity by placing plants within the main footprint rather than spreading them across the entire room.
My air plant develops mold or stays wet too long. Is this a lighting issue?
Mold or persistent sogginess is usually a sign of insufficient drying time or crowded airflow, not a light failure. Increase airflow with a small fan and create spacing between plants so water droplets are not trapped. If your display has glass or enclosed walls, consider venting or removing the plants during the drying window after watering.
Can air plants grow in a windowless room using artificial light, and what changes in watering?
Yes. If you have a dark room, you can still grow air plants, but you must account for how far the light can reach and how quickly the plant dries between waterings. Start with the closer-hang approach and consistent timer cycles, then monitor drying and rot risk closely. If you rely only on window light plus supplemental LEDs, treat the window as “bonus light” and keep the grow light portion steady.