Cress does not need direct sunlight to grow well indoors, but it absolutely needs light once the seeds germinate. If you are growing a bird nest fern instead, you may be wondering does bird nest fern need sunlight to grow, and the answer depends on light intensity and placement. You can grow dense, green, flavourful cress on a bright windowsill or entirely under artificial lighting. Ginger, unlike cress, typically needs warmth and indirect light rather than harsh direct sun to grow well does ginger need sunlight to grow. The key numbers: aim for 8 to 12 hours of light per day after germination, keep your light source within a few inches of the tray, and make sure seeds sit on the surface of your growing medium rather than being buried. Get those three things right and cress is one of the fastest, easiest crops you can grow indoors.
Does Cress Need Sunlight to Grow? Indoor Light Guide
Does cress need light at all? Germination vs. leaf growth
There are two distinct phases here, and light plays a different role in each. During germination, cress seeds actually require light to sprout. Both garden cress and watercress are light-dependent germinators, which means you should press seeds gently onto moist soil or a damp paper towel rather than covering them. Burying them even a few millimetres can suppress germination entirely. This is one of the most common reasons people think cress has 'failed' when really the seeds just needed to stay on the surface.
Once the seeds have sprouted and you can see the first tiny stems pushing up, the plant shifts into leaf-growth mode and its relationship with light changes. Now cress is photosynthesising to build chlorophyll and grow leaves, which means the more appropriate light it gets (within reason), the more compact, green, and flavourful the final harvest will be. Without enough light at this stage, cress stretches upward looking for a source, producing pale, floppy stems and watery-tasting leaves. Light is not optional after germination; it is the main variable you are managing.
How much sunlight vs. indoor light cress actually needs
Cress is a cool-season, fast-maturing crop. It does not need the intense sun that tomatoes or peppers demand. In outdoor terms, it tolerates partial shade. Indoors, that translates well: a bright but indirect light environment works fine. If you are using sunlight through a window, a south- or east-facing sill that gets a few hours of direct sun plus several hours of bright indirect light is genuinely enough. Penn State Extension confirms that natural light behind a window is usually sufficient for growing microgreens like cress, with artificial lighting as a useful supplement rather than a strict requirement.
If you are using artificial lighting, the University of Illinois Extension recommends exposing cress and other microgreens to 8 to 12 hours of light per day once they have germinated. That is your baseline. For comparison, seedlings that need to grow stems and roots fast (like tomato starts) are often given 16 to 18 hours, but cress is ready to harvest so quickly that 10 to 12 hours is the sweet spot for most setups. Going beyond 14 hours does not meaningfully improve the crop for such a short-cycle plant, and it wastes electricity.
Growing cress on a windowsill: when it works and what to expect
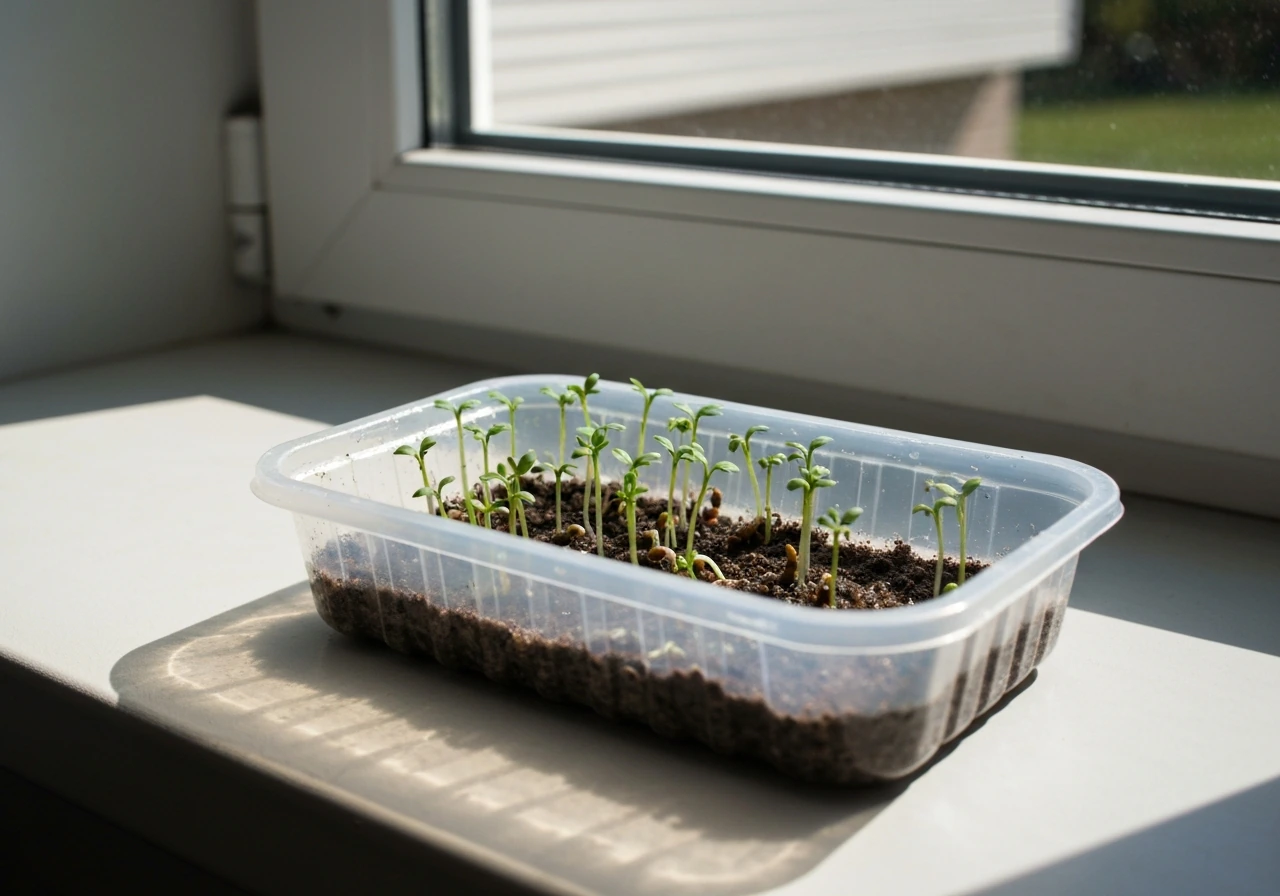
A windowsill is the most accessible and lowest-cost setup for cress, and honestly it is where most people start. It works well from late spring through early autumn when days are long and sun angles are high. In winter, a north-facing window may not deliver enough light intensity to keep cress from stretching, and you will notice the difference in stem length within a few days of germination.
A south- or east-facing window is your best bet. Cress grows in 7 to 21 days depending on variety and conditions, so even a modest windowsill setup will produce a harvestable crop reasonably fast. Rotate the tray 180 degrees every day or two so all sides get even light, otherwise you will end up with a tray that leans dramatically toward the glass. Keep the tray close to the glass pane itself to maximise the light reaching the seedlings. If your windowsill is on the cooler side (cress prefers 65 to 75°F), that is actually fine and will slow bolting.
What to expect on a good windowsill: germination in 1 to 3 days, upright bright-green stems within a week, and a ready-to-snip crop by 10 to 14 days for garden cress. What to expect on a poor windowsill: slower germination, pale yellow-green colour, and stems that flop over before harvest. If you see those signs, artificial light is the practical fix.
Growing cress under grow lights: LEDs, fluorescents, and what actually works
Artificial lighting is a game-changer for cress if your window situation is not great, or if you want to grow year-round without relying on the season. The good news is that cress is not demanding when it comes to light intensity, so you do not need a high-powered commercial LED rig to get great results.
LED grow lights
LED grow lights are the best all-round choice for cress. They run cool, which matters because cress prefers cooler temperatures and you do not want a hot bulb warming the tray and drying it out. Full-spectrum or blue-leaning LEDs work particularly well for leafy greens because the blue wavelengths (around 400 to 500 nm) drive compact, leafy growth. A modest panel-style LED designed for seedlings or microgreens, mounted 6 to 12 inches above the tray, will produce excellent cress. Fluence's own guidance notes that keeping a light at least 6 inches from the canopy helps ensure even coverage, and that principle holds for consumer-grade LEDs too. If your light feels very warm when held close to the plants, raise it a little.
Fluorescent and compact fluorescent (CFL) bulbs
T5 or T8 fluorescent tubes work very well for cress and microgreens generally. They produce even, diffuse light across a wide tray, they are inexpensive, and they do not get hot enough to stress cool-loving cress. The University of Minnesota Extension specifically recommends blue or mixed-spectrum bulbs for starting seeds and leafy greens, and a 6500K 'daylight' fluorescent fits that description perfectly. Position tubes about 2 to 4 inches above the top of the seedlings for good intensity. CFLs (the spiral bulbs) work in a pinch for a small tray but their light falls off quickly with distance, so keep them very close.
Regular household bulbs
Standard incandescent bulbs are not recommended because they produce mostly heat and very little of the light wavelengths cress can use. A 'daylight' LED household bulb (5000K to 6500K, 800 lumens or more) placed very close to the tray is a workable emergency option for a small batch of cress, but it will not give you the even coverage that a panel or tube light does. Think of it as the last resort rather than the plan.
Step-by-step light setup for success
- Choose your light source first. LED panel or T5 fluorescent for the best results; a bright windowsill if that is all you have. Decide before you sow so your setup is ready when seeds sprout.
- Sow seeds on the surface. Press them lightly into moistened soil, coco coir, or a damp paper towel. Do not cover them. Light reaching the seeds matters for germination.
- Skip a cover during germination or use it very briefly. Some growers use a humidity dome for the first 24 hours, but remove it as soon as you see sprouts. Lift any cover periodically to let moisture escape and prevent mold.
- Move to your light immediately after germination. Do not leave seedlings in the dark once they have sprouted. The first 24 to 48 hours of the seedling stage are when stretching starts.
- Set your photoperiod to 10 to 12 hours per day. Use a cheap plug-in timer so you are not manually switching lights on and off. Consistency matters more than total hours within the 8-to-12-hour range.
- Position your light correctly. LED panels: 6 to 12 inches above the tray. T5 tubes: 2 to 4 inches above seedlings. CFLs: 2 to 3 inches. Raise the light as plants grow to maintain roughly the same distance from the canopy.
- Rotate the tray every 1 to 2 days if using a windowsill or a single-direction light source. Even coverage prevents leaning.
- Check colour and stem length every day. Dark green, upright stems mean your light is working. Pale colour or leaning stems mean you need to move the light closer or increase hours. Harvest cress at 5 to 10 cm tall for best flavour.
Troubleshooting: leggy cress, pale leaves, slow growth, mold, and no germination
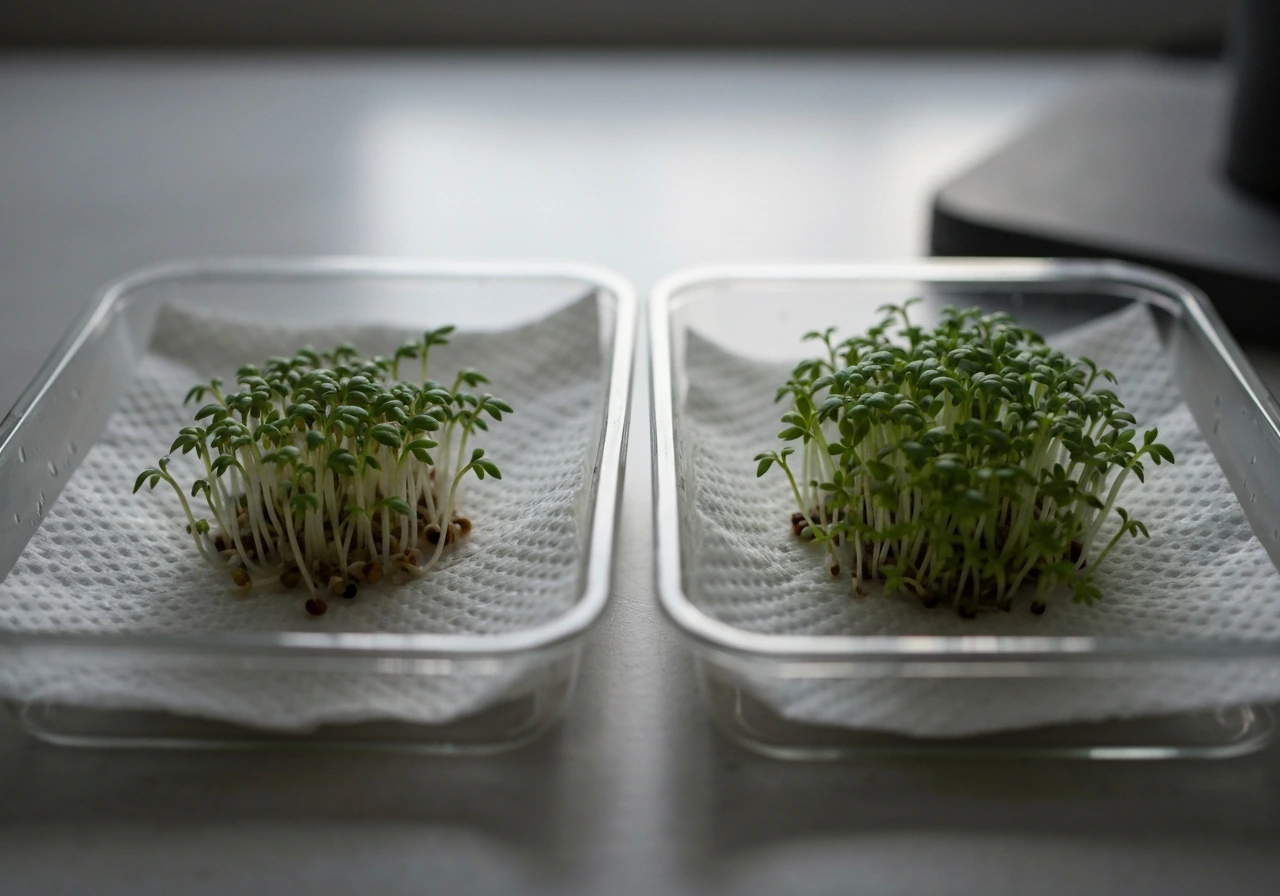
Stems are stretching and flopping over (etiolation)

This is the most common light-related problem and the most visual. Cress stretches when it is not getting enough light intensity, even if it is technically receiving some light. The fix is almost always to move your light source closer to the tray or to increase your photoperiod from 8 to 10 or 12 hours. If you are on a windowsill, try moving the tray as close to the glass as possible. Interestingly, some growers deliberately use a short blackout period after germination to encourage stem elongation for longer microgreens, but if you want dense, upright cress, keep the light on the seedlings as soon as they sprout.
Pale yellow or yellow-green colour
Yellow cress is under-lit cress. Without enough light, the plant cannot produce chlorophyll in the quantities needed for deep green leaves. Move the light closer, increase hours, or switch to a higher-intensity source. If you are on a windowsill and the days are short or overcast, supplementing with even a basic LED panel for a few hours a day will make a dramatic difference.
Slow growth
If your cress is taking longer than 14 to 16 days and still looks small, check two things: light and temperature. Cress grows fastest between 65 and 75°F. Much above 80°F and growth stalls and bolting risk increases; below 60°F and germination slows dramatically. If temperature is fine, increase light hours or intensity. Penn State Extension notes that cress and similar microgreens can be ready in as little as 7 days under ideal conditions, so if you are well past that with no harvestable crop, something in the environment is the limiting factor.
Mold or algae on the growing medium
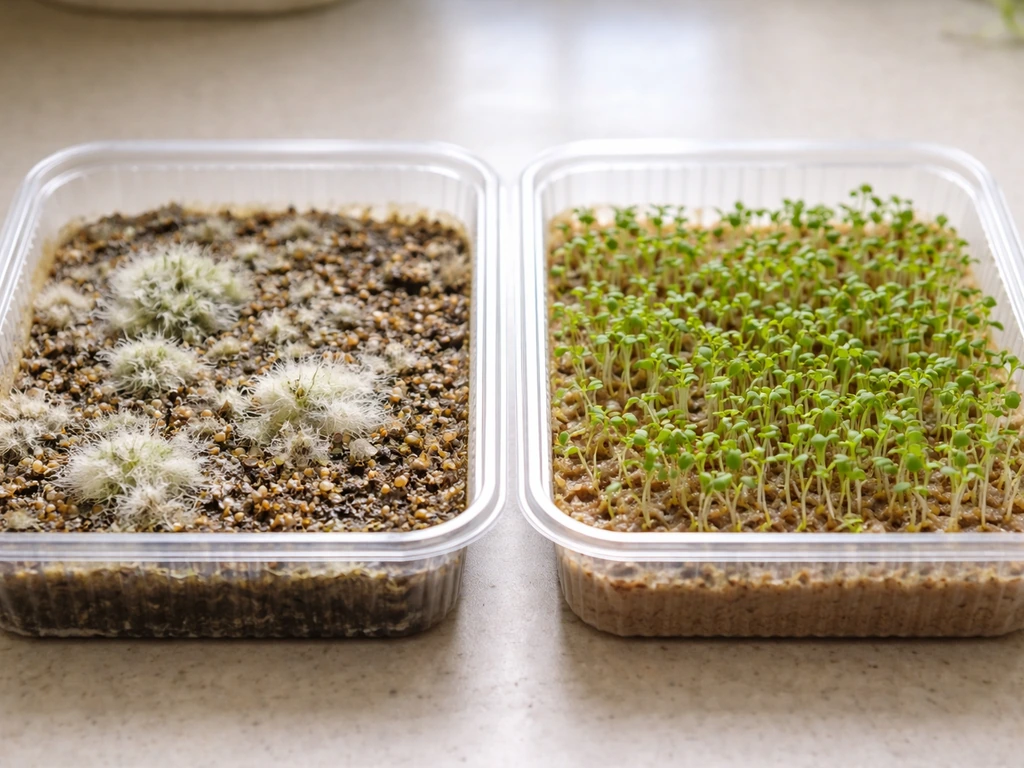
Mold and algae thrive in the exact conditions that cress germinates in: dark, warm, moist. The solution is ventilation and light. University of Maryland Extension also advises managing airflow and humidity to prevent mold, including using a short blackout after germination only if humidity is controlled so extra moisture does not encourage mold. Remove any humidity dome or cover as soon as seeds sprout. Periodically vent the growing space if you are using a covered tray. Good light exposure and gentle airflow (even a small fan on its lowest setting nearby) makes the surface of the growing medium less hospitable to mold. If you see a fuzzy white or grey coating, remove affected seeds and improve airflow immediately. Damping-off disease, which kills seedlings at the base, is also linked to high humidity combined with low light and low temperature, so improving the light environment directly reduces that risk too.
Seeds not germinating at all
If nothing has sprouted after 4 to 5 days, run through this checklist: Are the seeds sitting on the surface of the medium, not buried? Is the medium consistently moist but not waterlogged? Is there some ambient light reaching the tray? Is the room between 65 and 75°F? Old seed stock can also be the culprit. Cress seeds remain viable for about 3 years when stored properly, but seeds kept in a hot or humid spot lose viability faster. Do a quick germination test by placing a few seeds between two damp paper towels in a warm, lit spot for 48 hours.
Quick cheat-sheet: best light plan for each cress type and method
| Cress type / method | Light needed to germinate? | Recommended photoperiod | Best light source | Notes |
|---|---|---|---|---|
| Garden cress (soil or coco coir tray) | Yes, surface-sow only | 10 to 12 hours/day | LED panel or T5 fluorescent, 4 to 8 inches above tray | Harvest at 7 to 14 days; rotate tray every 2 days |
| Mustard cress (same as garden cress for light purposes) | Yes, surface-sow only | 10 to 12 hours/day | LED panel or T5 fluorescent, 4 to 8 inches above tray | Slightly peppery; treat like garden cress |
| Cress on damp paper towel (classic egg-cup method) | Yes, keep in light spot | 8 to 10 hours/day | Bright windowsill or any LED within 6 inches | Very small volume; easy to forget to water; check daily |
| Watercress in water/hydroponic tray | Yes, surface-press seeds | 12 hours/day | LED or fluorescent above water tray | Needs water management; algae risk increases with more light and shallow water; use dark-sided container |
| Windowsill only (any cress variety) | Ambient window light fine | Natural day + indirect sun | South or east window as close to glass as possible | Works well spring through autumn; supplement with LED in winter |
| Grow light only (no window) | Artificial light from sow | 10 to 12 hours/day on timer | Full-spectrum LED panel or T5 tube | Most consistent year-round results; set timer and forget |
Cress is genuinely one of the most beginner-friendly crops you can grow under lights, which makes it a great starting point if you are new to indoor gardening. It shares that easy-going quality with other fast-sprouting plants, though something like grass or bird nest fern will behave quite differently once you move into longer growing cycles. For cress, the crop cycle is so short that even modest lighting adjustments show results within days, which means you can troubleshoot and correct in real time rather than waiting months to see whether a change worked.
FAQ
If cress seeds need light to germinate, do they need light even before the first sprouts show?
Yes. Light is required during germination, so keep the seeds exposed (on the surface of moist medium) as soon as you sow. Once sprouts appear, you can keep the same schedule, just continue with 8 to 12 hours of light per day to support leaf growth.
Will cress grow if I only use indirect window light, with no direct sun at all?
Usually, yes, as long as the window provides bright light and you keep the tray close to the glass. If you notice pale color or tall, floppy stems within a week, add a small LED or extend your daily light time to make up for low intensity.
How close should my LED or grow light be, and what if I can’t measure the distance?
Use an easy check: if the light feels noticeably warm at plant height, raise it slightly and rely on longer daily exposure. For setup, a common starting range is about 6 to 12 inches above the tray for LEDs, and roughly 2 to 4 inches for T5/T8 tubes.
Can I reduce the light hours to save electricity, for example 4 to 6 hours per day?
It is not a great idea after germination. Cress needs continuous light support for compact, green growth, and shorter photoperiods often produce yellow, stretched stems. If you must cut time, compensate by improving intensity (closer light) rather than dropping far below the 8 to 12 hour baseline.
Does rotating the tray matter if my lights are overhead and I think coverage is even?
It still helps. Overhead lights and windows can leave small intensity differences across the tray, and even mild imbalance can lean growth over a short 10 to 14 day cycle. Rotating 180 degrees every day or two prevents uneven harvest quality.
What’s the difference between cress being ‘under-lit’ and having a temperature problem?
Under-lit cress turns pale and grows tall and floppy, even if the room temperature is fine. Temperature issues show up differently, with growth slowing or bolting risk rising when it is too warm (above about 80°F). If it looks both pale and stunted, prioritize light first, then verify temperature.
My cress is moldy, and I thought light would fix it. What’s the practical first step?
Remove any cover or humidity dome immediately once sprouting begins, and improve airflow. Use gentle ventilation, even a low fan nearby, because mold is driven by moisture and low light, not light alone.
Can I germinate cress in the dark and then move it to light once it sprouts?
Not reliably. Cress germination is light-dependent, so dark conditions can suppress sprouting. If you want longer, thinner stems, keep light low only after germination, not during the germination phase.
How do I know my cress is getting enough light if I can’t compare it to another setup?
Look for compact growth and deep green color within about 7 to 10 days, depending on variety. If stems are upright and leaves look rich green, your light is working. Pale, watery leaves or rapid stretching are clear indicators to move the light closer or increase hours.
Will cress still grow under a very cloudy sky or in winter with a north-facing window?
It can, but north-facing winter windows often lack enough intensity, especially for the cool-season microgreens. Expect stretching or slow growth, and plan on a supplemental LED or moving to the brightest available window to keep harvest timing on track.
How can I tell if the failure to sprout is seed quality rather than light?
Run a quick germination test: place a few seeds between damp paper towels in a warm, lit spot for 48 hours. If they do not sprout there, replace the batch, because old or heat-damaged seeds are a common culprit even when light and moisture are correct.